
Indeed I have finally bitten the bullet and got myself an airbrush. If anyone has noticed a relative lack of articles it is because I have been thoroughly experimenting with said airbrush. The most important thing I've learned so far is that it's best to have some knowledge before getting into airbrushing. Go out and find out as much as possible, look at what Mistress of Minis has to say on the subject, find forum posts about it.
You don't need to get an expensive airbrush and compressor. I did, but I did that only because I had no idea what I was getting in to. I am definitely happy with what I got though, I've managed to get weeks worth of quality work done in mere hours of airbrushing. It's definitely not something any model painter needs to have, it's not essential but it certainly can augment the speed of your painting. However some things are definitely best done by a brush.
 So let's get to it, the airbrush I use is the Iwata Eclipse HP-CS double action gravity feed. There are certain drawbacks and benefits for both siphon feed and gravity feed. It's best to know which you will prefer to use before getting it. I personally like the gravity fed airbrush, I just have to make sure I don't make too flamboyant of hand gestures when painting.
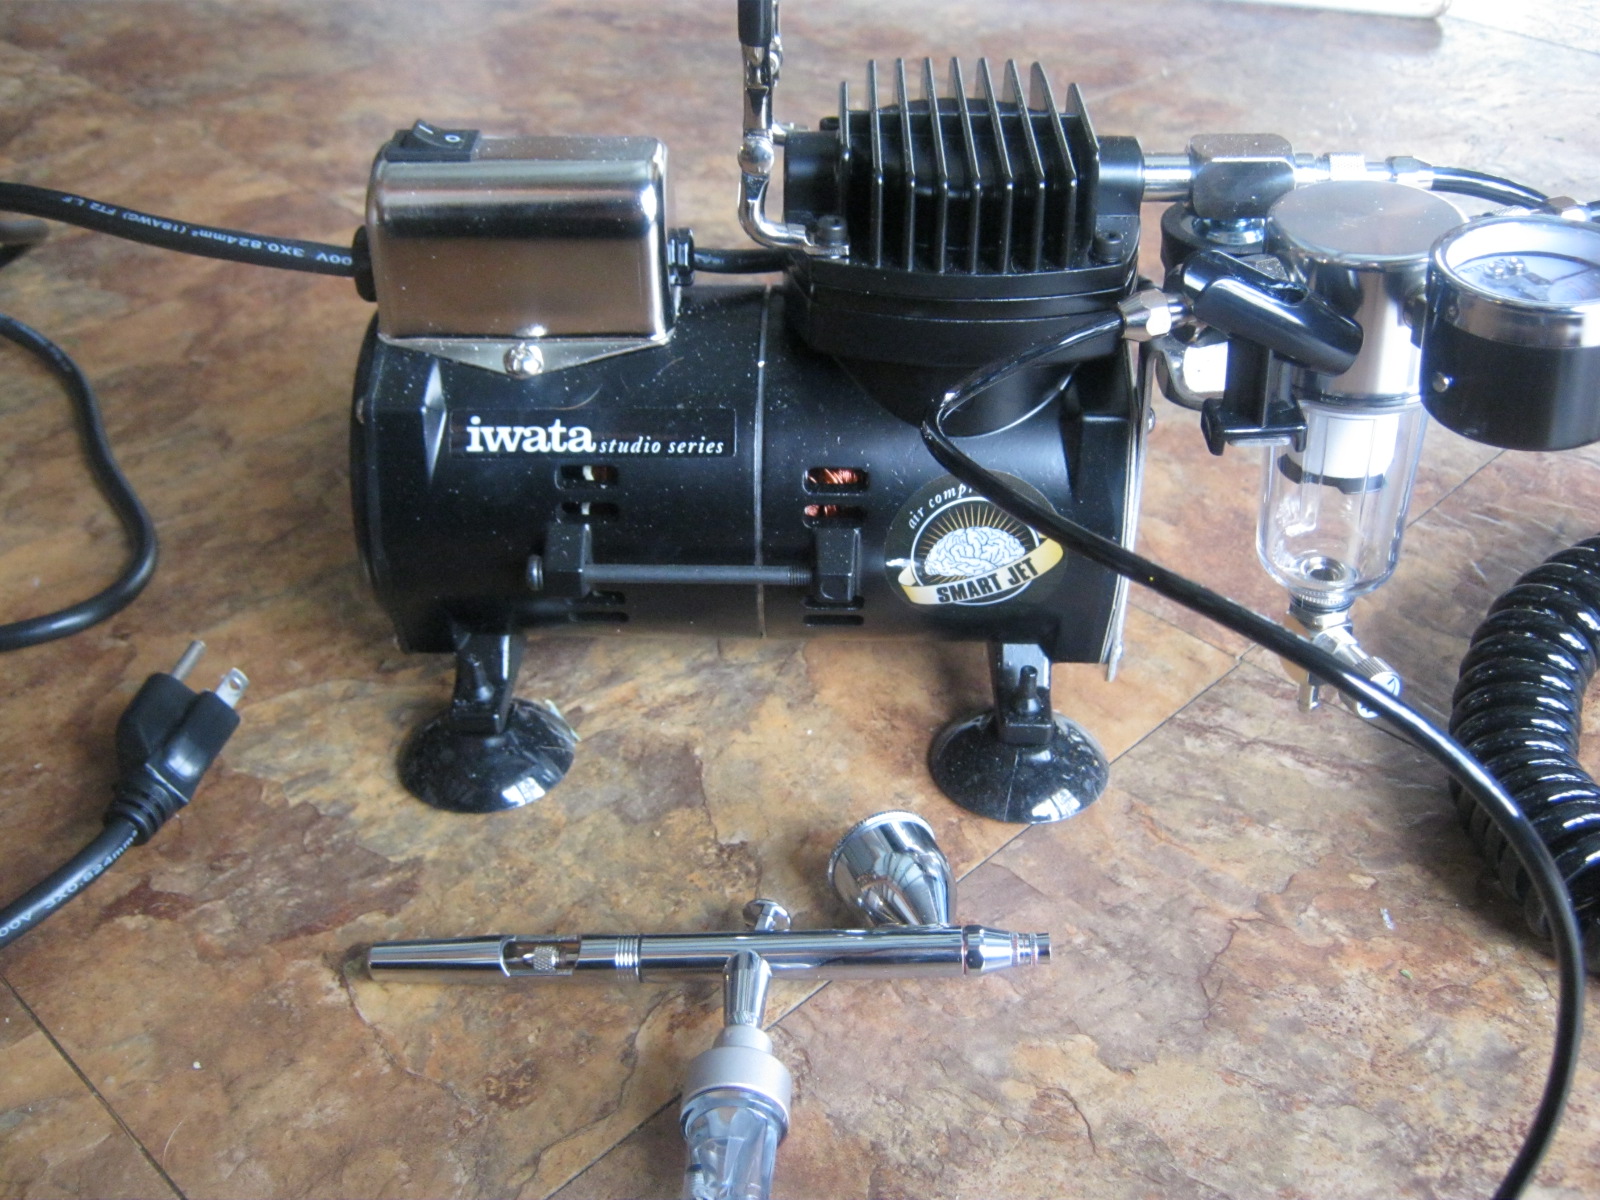 The compressor I use came with the airbrush, it was a package deal including an art book and a good instructional DVD. I have the Iwata Smart Jet Air Compressor. It handles only about 45 PSI, which is enough for model use. It's pretty quiet, it won't distract you from concentrating, but I don't suggest using it when people are sleeping nearby.
These things are important to remember, as you'll probably read from others. You must have an air compressor that prevents pulsation. I'm not entirely sure what that is, I haven't experienced it, but apparently it's bad. If the air compressor isn't designed to stop pulsation you're only working towards ruining your models. Also have a moisture trap for your airbrush. It's the clear thing underneath it. This keeps the air dry; the paint has enough moisture to deal with as is.
 |
| Mechrite, Blood Red, and Sealer. 1.5 hours. |
Spraying with Colours
For my airbrush I have been using Citadel paints since they're what I have available and close at hand. I use your standard pharmacy isopropyl rubbing alcohol as my reducer. Rubbing alcohol seems to work fine since it breaks up the paint very nicely and when sprayed it dries fast enough so that paint doesn't splash everywhere. I tried using water once to see what would happen, all that resulted was beads of paint across the model being sprayed in every direction making an absolute mess. Fast drying is extremely important.
 I'll admit, the first time I used the airbrush I was disappointed. After the third layer I began to become very pleased with the results. Airbrushing results in extremely fine layers of paint lightly misting on top of the model. It does take many many passes to get a nice, solid coat of paint. Even after you get a solid coat on, it is very easy to scratch off. It is important to seal the model as soon as you're done painting it. It's harder to scratch paint off resin models.
For the first layer, don't be surprised if you can't tell if there's any paint staying on the model, especially if you're brushing onto black basecoat. You won't start to notice colour until three to five passes. This is normal, and if you don't spray too heavily there won't be any detail lost, no matter how shallow it may be. Continue spraying the model until you are happy with the brightness of the colour. There will come a point when broadly spraying will no longer be desirable, you'll start to use the burst and dry technique. You release a small burst of paint and let it dry.
Here are some special cases that I've noticed when working with paint formulae:
White: For some reason, white seems to be particularly tricky to get a nice, smooth layer out of. I found that using more alcohol than paint makes white apply better to models. A 60:40 mix of alcohol and white seems to be the best.
Black: The opposite of white seems to be true. Too much alcohol, and the black doesn't seem to leave much of a mark. I spray on top of a black basecoat which doesn't help. A 40:60 mix of alcohol and black seems to give the best results. For some reason it ends up a little red. When I used the GW paint sprayer, it would turn green, and brown one time. I'm not entirely sure why this happens or how to stop it, but it settles down after a little while.
Colours: For all the other paints, using 50:50 is fine. Depending on how close to black or white they are, I tend to use more or less alcohol respectively.

Sealer: I picked up some Reaper Miniatures Brush-On Sealer. For this I used bottled water instead of alcohol. I didn't want the alcohol separating the sealer for obvious reasons. So far this has seemed to work pretty well. It goes on perfectly clear; it's hard to tell if it's even on the model. From initial tests, it keeps the paint on the model after airbrushing.


Gloves: These keep your hands clean and from accidentally putting fingerprints on your fresh paint. Airbrushed on paint is extremely susceptible to being affected by transfer from fingers, be it leftover paint or the natural grease produced by Human skin.
Spare Brushes: I keep a couple brushes around for cleaning and for getting paint out of the bottles and into the cup. Paint always needs a good stir before being airbrushed onto the model and a brush helps with that.
Paper Towel: For clean up, either paint spills or wiping down the airbrush.
Spray Box: To spray your models in. It collects the excess paint being sprays into the beyond and keeps you from making a mess all over the place.
Rubbing Alcohol: This is to ease the paint through the nozzle, to make it dry faster, and it's also really good for cleaning the airbrush after you're done spraying. It's also an effective disinfectant.
Spray Mask: A cheap and expendable rebreather unit. If you're like me and needs to be up close to the action when painting, you don't want to be breathing in the paint. Wear a face mask. Mine is all sorts of funky colours from the paints I've used so far.
Silly Putty: This is a trick I picked up from Les from Awesome Paint Job. He uses it to cover areas he wants to leave a certain colour before spraying on another colour. This makes your airbrush that much more versatile. Les also makes a lot of excellent tutorials, so definitely check him out.
A Plan: Know what you want painted and how before painting. Have assemblies of parts done beforehand so that they aren't going to block the paint. Know which paints you want on first so that you can cover that up and spray on the next colour. Knowing ahead of time will save you a lot of grief and make your airbrush more useful.
Clean Up
The most daunting thing I found about first using the airbrush was actually cleaning it. When spraying, if you shift to a similar colour, you don't need to do a full clean. Passing between Mechrite Red and Blood Red isn't going to affect the colour noticeably. Run some alcohol through the airbrush and wipe the paint cup is enough for like colours. Switching to sealer or another colour does require a thorough cleaning.
Cleaning itself isn't the daunting part, to be honest, it's actually taking apart the device and knowing how to put it back together. It's actually quite simple once you do it but having someone show you first helps. So I've done just that for all you airbrushing beginners like myself and made a quick video of me taking apart my own airbrush.
 |
| Spot the error. Not an easy fix either. |
Signing out
Cursed13
No comments:
Post a Comment