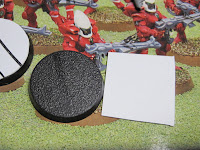
If you've gathered anything about my articles, I'm sure you've noticed I like to plan things out long before I work on them; concept sketches and design plans for each project. The common design I follow for all my armies is that I base them with the terrain of their home world, with the exception of my Tau force which I designed to be a purely city fighting expansionist force. With this in mind, I set about making Wraithbone bases for my Eldar models, as they are from the Iybraesil craftworld. So here are the steps I took to create said bases:
Step 1: Get out something that is sturdy enough to handle a few cuts from a precision blade. A cutting mat or expendable cardboard packaging should do just fine. Using .25 mm plasticard, I scored a square slightly larger than an Infantry base. This gives room to make mistakes if you cut off too much. After scoring, I simply snap the piece out.
*PLEASE NOTE, Plasticard has two sides: a smooth, shiny side, and a porous, textured side. The textured side makes for a better Wraithbone result. Always check which side you are using before gluing*
Step 2: I chose simple designs to follow when scoring the square piece. Using the Games Workshop Eldar Walker base as reference, I made curved or almost straight scores across the square. I snapped along the scored line and glued the resulting pieces slightly spaced apart onto the base itself. I like to put as many together at one time as possible, it makes the next step easier.Step 3: After the glue sets, I roughly cut away corners with the plastic snips. Precision isn't what I'm interested in at this point, I just want as much excess material out of the way.
Step 4: Once the rough cut is done, I took my precision blade and cleaned up the rough corners. This is of course to make the basing fit the small round base. You can see some glue on the base below. I plan on adding a little dirt and stone to some of the bases to give more visual interest to them.
 I never like wasting anything, even if it's scrap plasticard bitz. I collected the rough cuts from the basing material which I'll be adding to my plastic rubble spread that will go on rubble barricades or inside ruined buildings. Depends on what needs it more. After I airbrush the bases I'll add some painted images as well, so make sure to check back for those.
Signing off
Cursed13


No comments:
Post a Comment